Sunday, February 5, 2012

The only thing sweeter than Taylor Swift is the buttercream...

I was asked to make a cake for a girl that is a big Taylor Swift fan. I'd made her brother a birthday cake not too long ago. I guess it went over well because they asked for one for the big party which included a mess of girls, a movie theater, and lunch.

Seeing as how the hubbin is a HUGE Taylor Swift fan (seriously, he puts most 13-year-old girls to shame with this), I got him to help me plan this cake. When I think of iconic Taylor Swift, I immediately think of her sparkly guitar.
That isn't my picture. I stole borrowed it from MTV. But it's such a cool guitar. I learned it is a Taylor guitar (fitting no?) that was specially created for the "Our Song" video. Apparently, it is a good guitar but must sound weird with all the sparklies all over it. But I decided my heart was set on making a guitar.

And good news! I actually got some shots of the process so you can see the crazy that goes through my head when I make these things.

My first job was to make the rhinestones to go on it. I figured that isomalt was the way to go. I priced buying some, but they're like $10 for 20 and I needed a metric crap ton of them. (Yes, that is the scientific measurement used for isomalt gems.) So off to my favorite cake store! I got a couple different types of candy molds to pick between.
 (My finger for scale)
I had initially planned to use one of the molds on either side of my finger, but since the guitar needed to be pretty small I ended up going with the ones on the top right part of the picture. Those were some seriously tiny gems.

Next step was to cook the isomalt. They make precooked sticks but they cost a whole lot more and I'm a confirmed cheapskate. And it was honestly pretty easy to do. Isomalt in a pan, add a little water (I used distilled per some suggestions on the interwebs), then heat till it hits hard crack stage. And don't burn the holy-living-crap out of myself in the process.

Isomalt is more stable than sugar, doesn't caramelize, and gets quite a bit hotter. Almost to the 340°F that it needed to be.
I didn't get pictures of the next step, but I griped about it a lot on Facebook. The molten isomalt goes into a silicon measuring cup that was easier to pour out of. Then I had to drop it one tiny drop by tiny drop into each of the holes in the mold. But if it cooled, it got too thick and the little drops became bigger little drops and overflowed the mold. So I'd stick it back into the microwave and melt it back down and then repeat. Over....and over......and over....and over....and over....................
You can see the weird tear drop shape of an overflowed mold. The gems on the plate were the first I tried so I started with the large ones and moved on to the tiny ones. You can see how much smaller the overflowed one is. That's the size of all the ones that went onto the cake.

Some of the good ones, with only a few bubbles.
I managed to burn my fingers about a brazillon times making these things. All things considered, I'd totally do it again. I'm hoping to learn how to make bubbles.

Cake planning! I found a website that had pictures of the Taylor guitar, printed it out real big and cut it out. I actually ended up shrinking it down some from this, but you see I was actually planning.

I went shopping for something to cover the cake board. I found this wrapping paper at Michael's and sent the hubbin a text that said "Does this color of pink make you think of Taylor Swift?" I got worried because the oils in the cake and frosting can bleed into some papers, so I put this back.

I found one of my favorite board covers at Target. This is a roll of Contact Paper that you use to line drawers and shelves with. It's water/grease proof and self-adhesive. Super easy to cover the board, particularly the rectangle one.

Here's the cake! I baked it in my big pan, then cut it in half and stacked it on top of each other. That was the easiest way to go about it. I actually thought I was going to need more cake (since I'd initially thought I would make it larger) and baked two of these. I cut the second one up, wrapped it in foil, and let the hubbin eat it. After a week, it was still surprisingly moist and flavorful. The mark of a great recipe.

The first step was the carve the guitar body out of the cake. I put the print out on top of the cakes and carved away. then I cut out the hole in the front and a place for the neck to go.
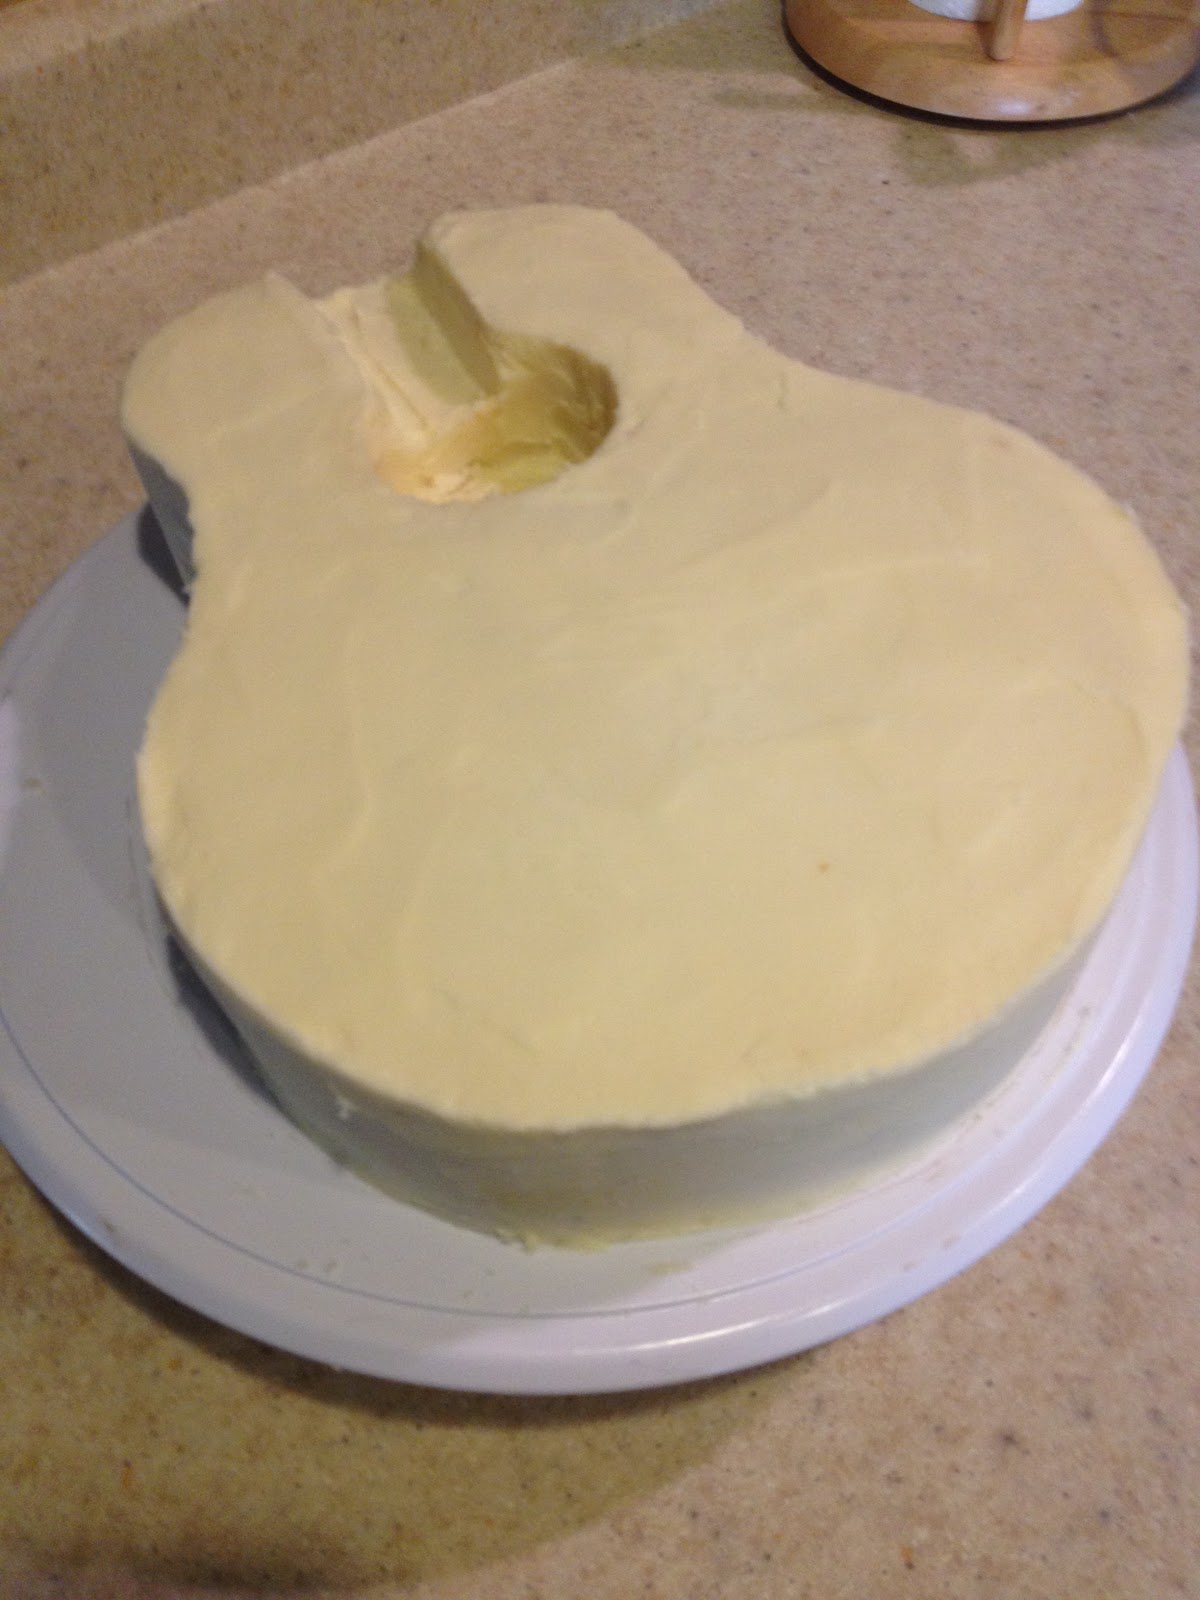
See how nicely they match?

Covered in white fondant and the hole filled in with black. The actual guitar is black, but I figured the sparkles would look nicer on a black background.

And the finished product!
I wrapped black fondant around the guitar body. That was actually the hardest part of the whole cake. I use Satin Ice in black and it's very soft and tore horribly as I was putting it on. Finally rolled it out on a sheet of wax paper. That added stability and kept the fondant from pulling. The gems were carefully placed one at a time. I may have complained about that on Facebook too.

The neck is cardboard covered in Rice Krispy Treats, then buttercream, then fondant. The struts are painted on with luster dust. The strings are just silver elastic string I found at Michael's. And because it seemed awful monochromatic with just the black and white, I added the birthday girl's name in pink.

Happy Birthday Ashley!

Wednesday, January 18, 2012

Wayback Wednesday

So I don't think I've posted these pictures before and they're pretty old, but since I've made something of a theme out of it I thought I'd share. The hubbin works at TCTMNBN and they had a company softball tournament a few years ago. So I made cupcakes.

Pretty cute right? And leave it to me to have the one right in front missing some of the little string thingys. And the hubbin even caught the ball once when it was hit to him!

Wednesday, January 11, 2012

Since the NBA is back to doing something other than marrying Kardashians...

I had a request for a birthday cake for a 'bout-to-be 11-year-old who is a big fan of basketball. And the Miami Heat in particular. Did you know that's where Lebron James plays? I totally learned that because of this cake. :) Seriously...

I had grand intentions of making a 3D basketball with my ball pan, but one half of the cake had apparently become quite attached to the pan and who am I to argue with confectionery true love? So I ended up with a 2.5D ball. And since basketball is played on hardwood (yes, I Googled that too), I added some to the cake too. But it was really dark in color and I ran out of yellow Americolor gel. Sigh. This cake turned out pretty awesome for being such a pain in the butt. So here ya go:
 The Spaulding logo ended up looking pretty wonky. But I was freehanding it with a marker, so you can't be too picky, right?

Tiny little Heat logo and a look at the wood grain. I actually really love doing this technique.

Did you notice the awesome texture?
I regretted it by the fourth dang little dot. All done with a little round piping tip. That actually took longer than the rest of the cake combined. The fondant was playing nicely for once. Then again, wasn't summer here in AZ when I was doing it either. Have I told you about how I crank up the A/C when I do fondant? And the buttercream smoothed pretty well over the weird shape and crusted just enough to smooth it some more.  I guess the rest of the cake made up for the baking issues.

Happy Birthday William!

Tuesday, December 6, 2011

It's beginning to look a lot like Christmas...

Got a quick one for you. I had two parties to go to this Saturday. Yes TWO! Considering I've been to four whole parties in the last 6 months (two first birthdays, one second, and one seventh[picture is behing held hostage by old cell phone, gotta find i]), I was pretty excited to go to "grown up" parties. And of course, it has been a while since I've baked so I had to bring a gift, and this is what they got:

Tiny little cupcakes! Yup, those are minis.

My go-to chocolate cake recipe makes the cupcake. Frosted with plain ol' American buttercream that I hit with some generous peppermint oil, topped with crushed peppermint candy (thanks to my hubbin for all the crushin), with a white chocolate snowflake on top. I totally made those snowflakes. I figured it had been quite a while since I last tried the chocolate decorations. But seriously, tiny cupcakes need tiny snowflakes and chocolate is pretty peculiar. But I have a whole bunch of the chocolate left. I'm either making more for my work Christmas lunch or I'm making cakepops.

And just cause it's awesome, I need to introduce you to my new favorite Christmas decoration: Kevin Bacon the Santa Pig. I found him at Big Lots and fell in love. And he totally lights up! He may stay out all year long.

Monday, November 28, 2011

Better Late than Never

I totally made cupcakes for Halloween and promptly forgot about them. I didn't put a whole lot of work into them, but they went over well.

I went with the white velvet cake recipe from the Cake Bible, but I subbed orange flavor in for the vanilla. Then I dyed the batter yellow and orange and layered them. The swiss meringue frosting on top stayed white but got the orange too. Then I put them all together and stuck a candy corn on top so that people would "get" the theme.

I should have actually looked at the color combination of a real candy corn before I got to working cause I totally should have put the yellow on bottom. Oh well, the two dozen I brought in only lasted until lunch, so my coworkers weren't too put off.

Of course the best part of the day was by dear doggie all dressed up to hand out candy to the neighborhood kids. You can tell she's excited since the tail wagging just blurs. And for the record, totally buy KitKats, the kiddos went NUTS for them!

Wednesday, November 23, 2011

Wayback Wednesday

Here's to You, New York, New York

I totally just found this post that I never actually published. Weird, right? Good excuse for a Wayback Wednesday since I'm out of ones I actually knew about.

This cake was made during my Wilton's classes, so it's been a while. It looks like we were learning about marbling (which was pretty cool, but I haven't used it since, and draping, which I have avoided like the plague. I did really like the boarder around the base of the cake. Gonna have to use that sometime.

This cake ended up going to TCTMNBN since one of the hubbin's coworkers was moving back to New York City. Totally jealous, though I know I'm a small town girl at heart. Apparently it was strawberry and I didn't have the right size cake circle to put it on. 


Sunday, November 20, 2011

Y? Because we like you!

I had the opportunity to make a semi-wedding cake. I say semi because the wedding was held a while back at Disneyworld, but the happy couple wanted to share an evening with their friends here in the desert. The groom works at TCTMNBN with the hubbin. I might refer to him as the hubbin's boyfriend.

I was given pretty much free reign with the design. For some decorators this is freeing, but I will admit that it mortified me. What to do?! Good thing I have been jonesing to try quilting on a cake. Add in a Mickey and Minnie topper to use, and I ended up with a cake that was elegant and understated.

I like to post a sneak peek on Facebook while I'm working on the cake. Here's the one I posted the other night:

Of course here are the pictures you are here for:
The cake topper was from the wedding in Disneyworld, it was part of the package and the couple wanted to use it at this party. Minnie's dress actually served as my inspiration. I took the pearls and the roses and used them in the cake.

The quilting was actually a lot easier than I expected, but I'm looking for a tool that is supposed to make it even easier.

The roses gave the cake a bit of color that is was lacking.


Did you notice the awesome cake stand? I talked my parents into buying it for me while we were in an antique shop. I doubt it's an "antique," but I thought it was pretty.

Congratulations to Matt and Daina!